Acorn: A Beginner's Guide


Kubernetes is difficult, and Acorn assists in making the difficult parts of Kubernetes easier to understand. deployment of an application.
In this guide, I will walk you through the process of creating an Acorn application and deploying it to the Kubernetes cluster in a matter of minutes.
Environment:
If you don't have Kubernetes on your laptop, here are the distros I use:
For Windows and Mac , enable Kubernetes using Docker-Desktop [https://docs.docker.com/desktop/kubernetes/].
For Linux, I use K3s: https://k3s.io/ Installing Acorn
Acorn has a CLI, and you can install it using the Scoop package manager for Windows.
You can install Scoop using https://scoop.sh/.
Once Scoop is installed, simply run scoop install Acorn.
Now Acorn needs to attach itself to the Kubernetes cluster. You can do that from your command line using Acorn Install.
Sample Application
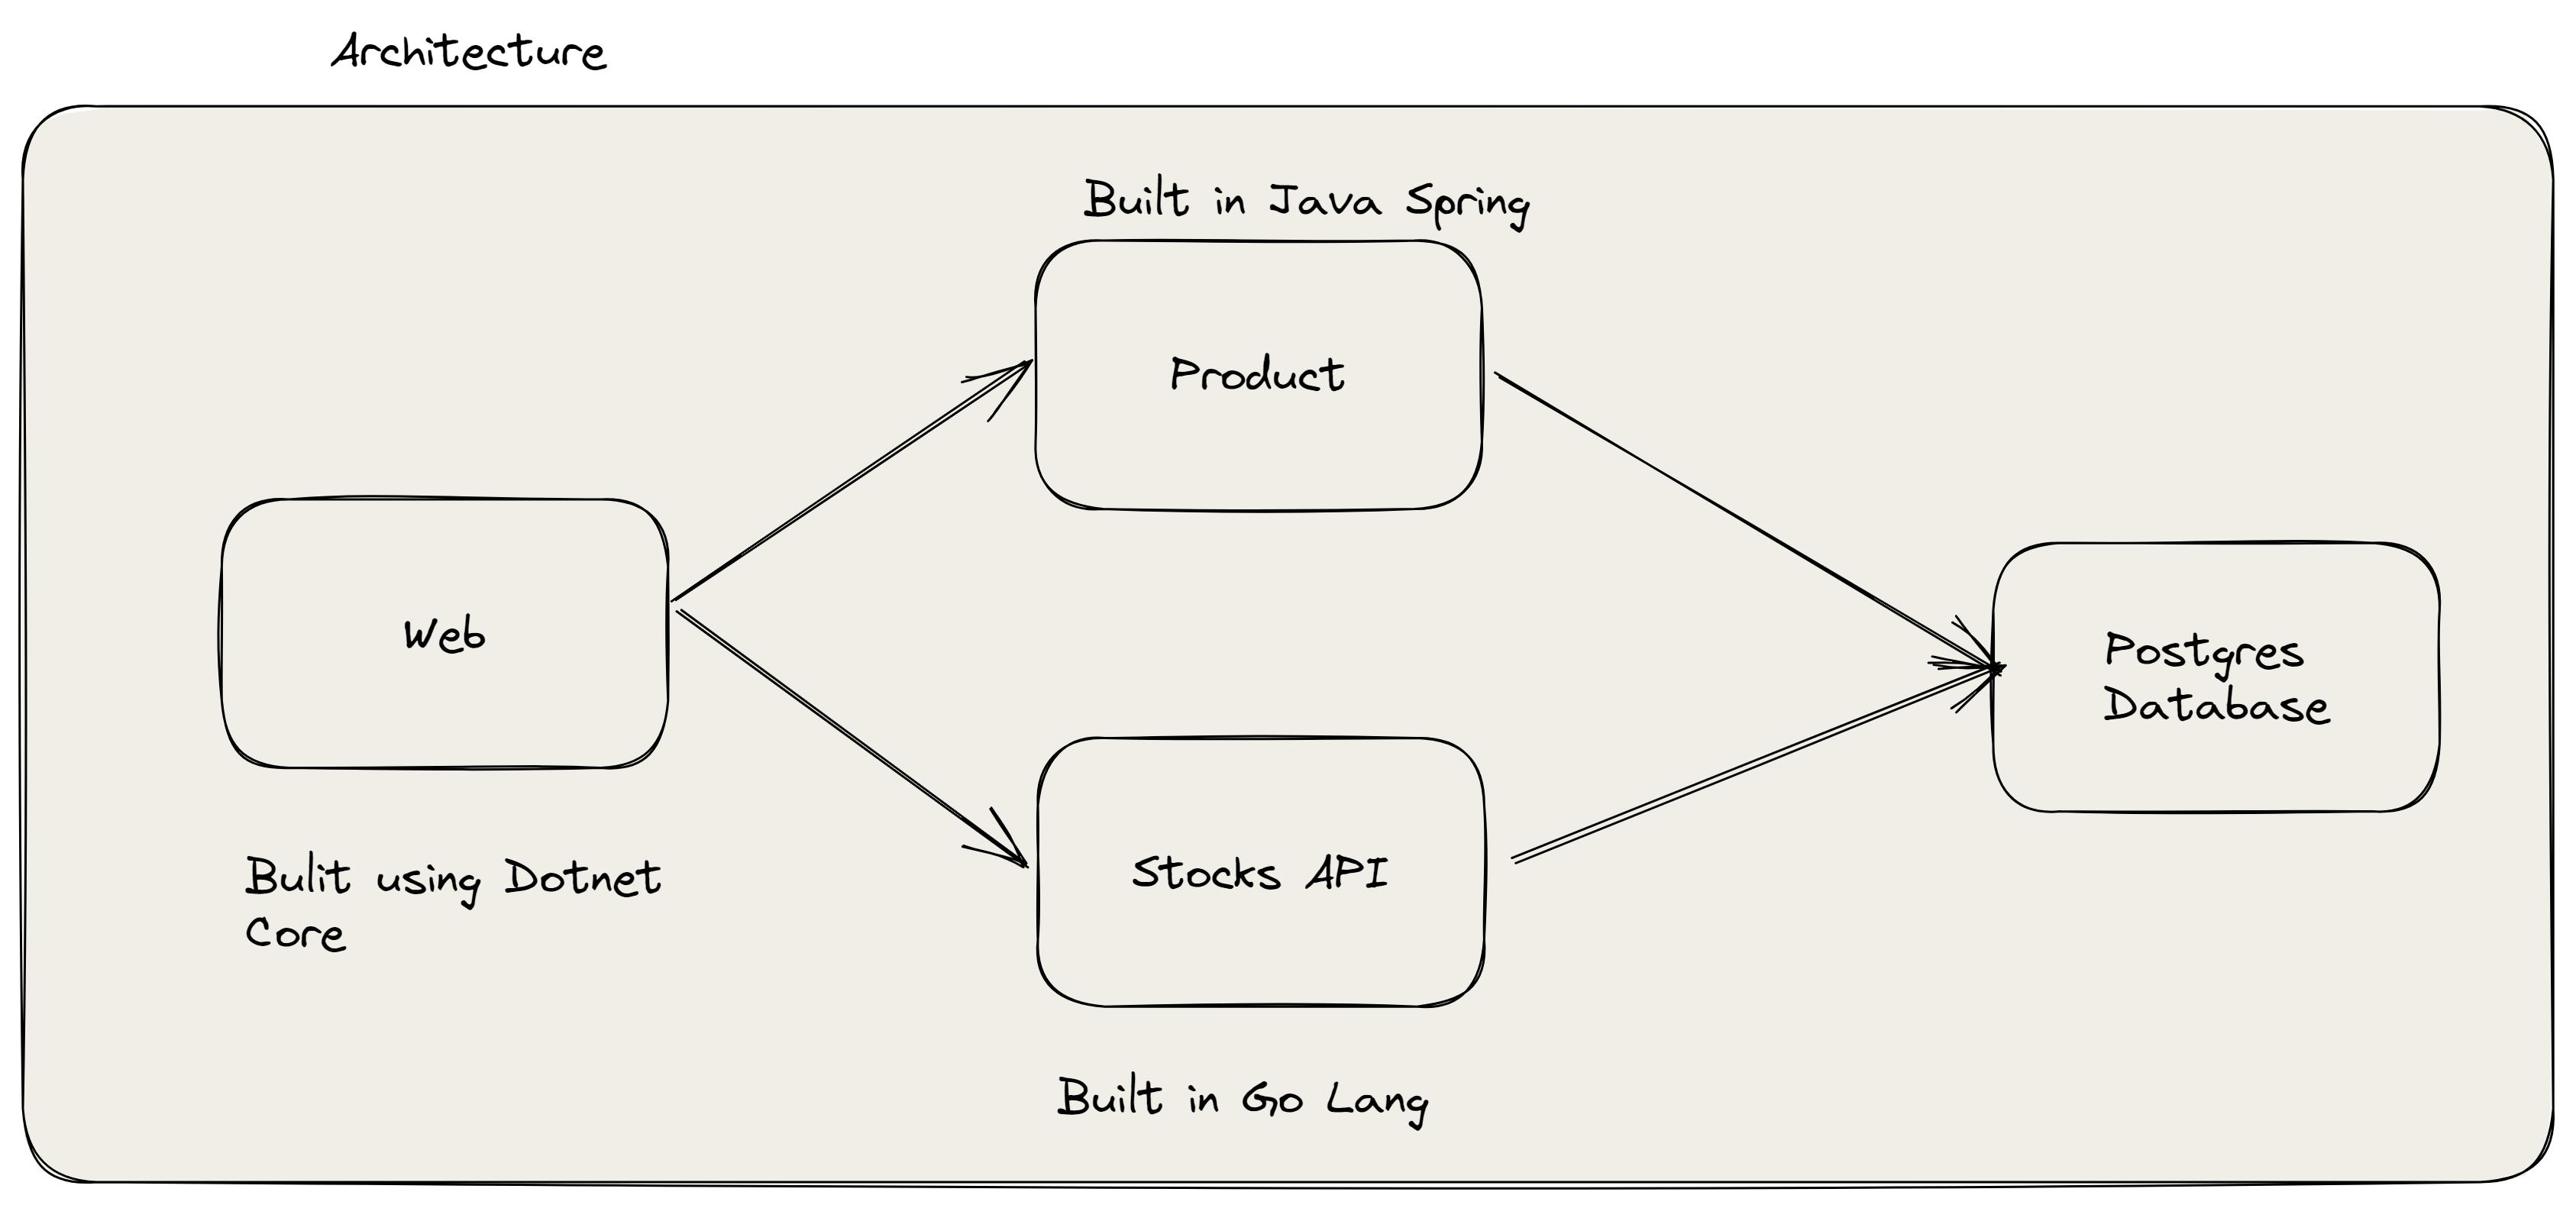
I used the Kubernetes in Production Sample application from the Manning Live Project. The application works with a microservices architecture and multiple languages and environments.
It's a simple e-commerce application that lists the products, prices, and stock availability.
Create your first Acorn file
Acornfile allows you to model your application using this collection of components. It uses the CUE language, which is similar to JSON but gives a better way to describe the application.
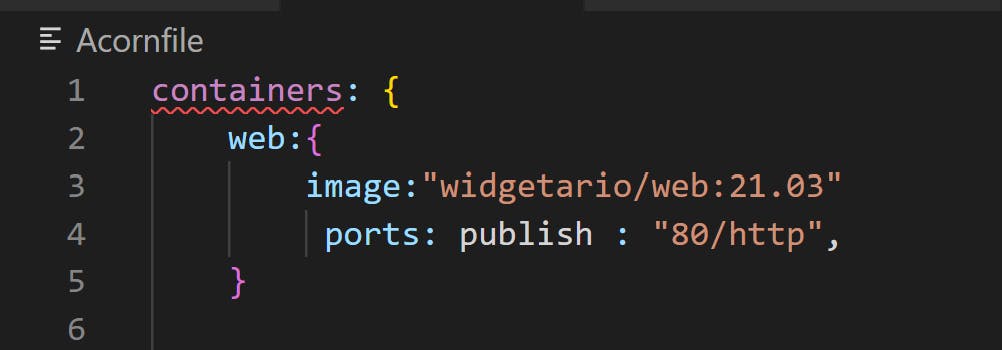
You can create a file called Acornfile without the extension. The default file name should be Acornfile, but it can be any file with a set of configuration.
To make the example simple, I am using the Docker images created previously. So here are the files and their uses:
widgetario/web:21.03: Web application
widgetario/stock-api:21.03: stock information of the product
widgetario/products-db:21.03: DB Image (Custom image for Postgres)
widgetario/products-api:21.03: Product information
Create an Acorn file in the Ecommerce folder to represent the eCommerce microservices. For each microservice, this file should only contain the container top-level key and an empty element, as shown below:
As shown in the file above, an Acorn file is as simple as the name of the service, an image name, and the port to expose.
Note: I used double quotes, which is not ideal because "-" is not recognized as a valid Acorn service name. I did this because the application requires it.
Ports:
By default, we can expose a port for the service and its internals to the application (namespace). It adheres to one of Acorn's guiding principles, "Secure By Default." You can choose to expose a port that can be used by the outside world by using the publish keyword, as seen on the web.
Testing the application
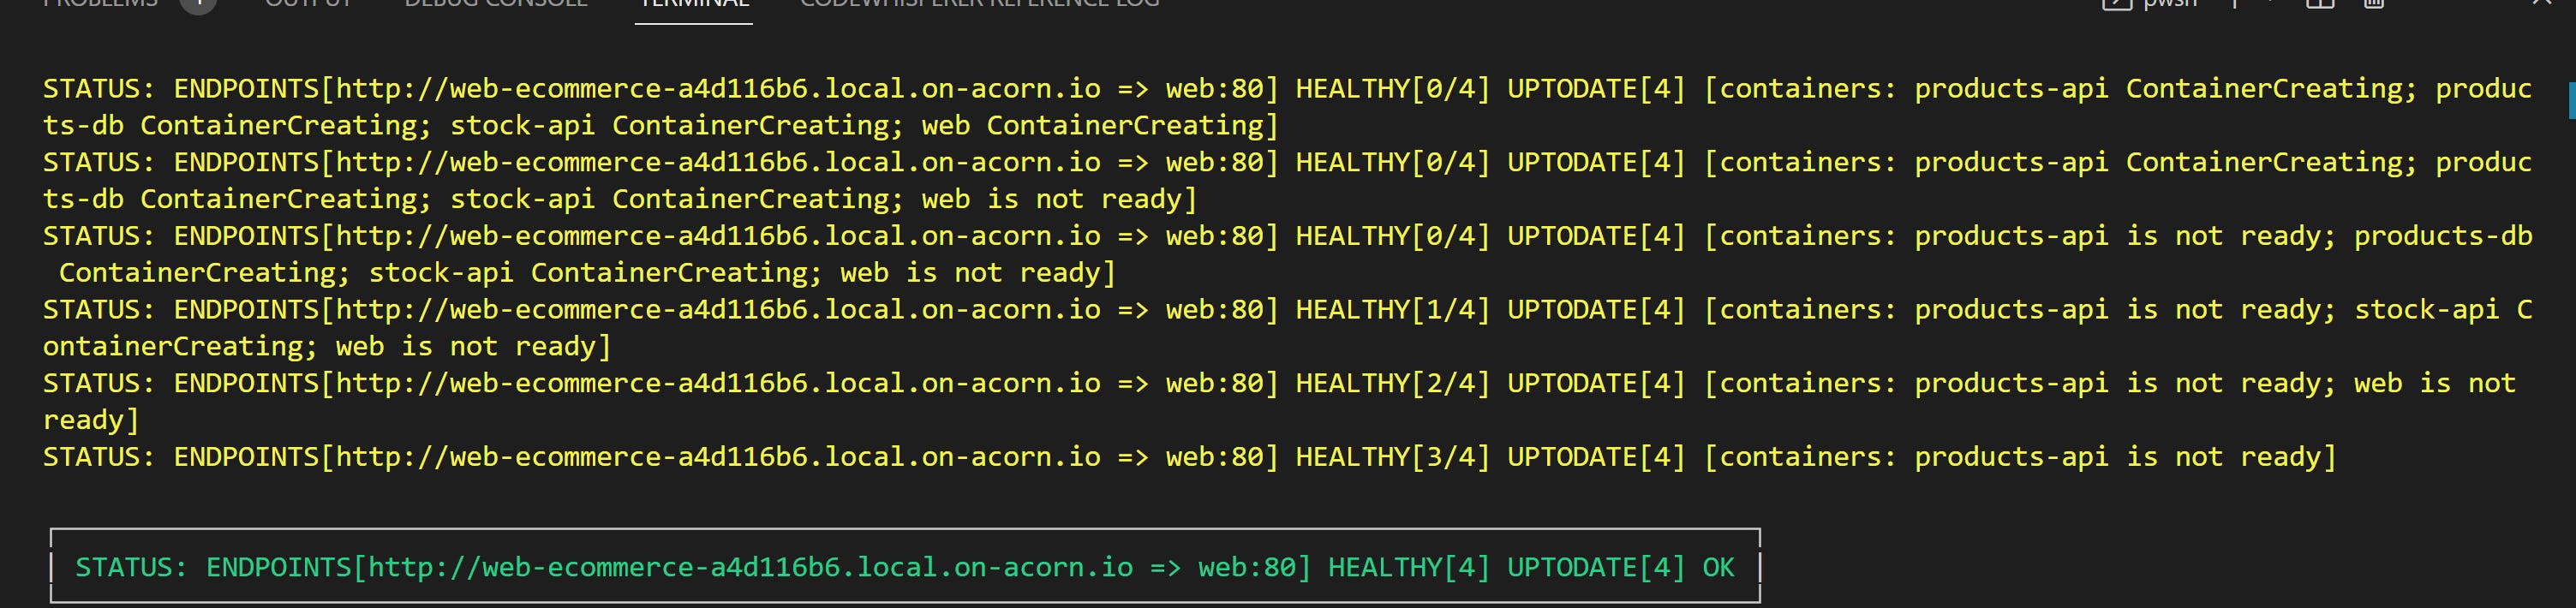
Now that we have a file, we can run the application in a local Kubernetes cluster with a simple command.
acorn run -n ecommerce .
Let's break down the command to better understand it.
acorn run: We are instructing the acorn to run the application. It need 2 information
-n: Name of the application.
"." : Location of Acorn, You can specify the file using the -f command or just say to look for the default Acorn file in the current folder.
After you run the command, Acorn creates pods, deployments, services, and ingress objects for Kubernetes on its own in your cluster. It then gives you a URL where you can view your application.
Coming from the difficult days of Kubernetes or Nomad, I was pleasantly surprised by the simplicity of Acorn.
Now, if you have the following questions:
How it generated the URL for the Application?
Can I deploy the application to any Cloud Provider?
How to do CI/CD for deploying the application
Many more!!!
I left those out on purpose to keep things simple, but I will be discussing them in greater depth in upcoming posts. If you want fast and immediate access, follow and subscribe.